Regency Gentleman’s Shirt
I have created a Regency Outfit which is to be worn in 2015 as part of my talk ‘Enter the World of Jane Austen’. This elegant outfit comprises of a shirt, trousers, waistcoat, coat and cravat. I have completed the shirt, trousers and waistcoat and still have to make the coat and cravat but thought you may be interested in seeing pictures of the costume so far. (Click any photograph for them to enlarge).
My Regency Shirt was created in the 1790-1830 in the English Style’ with period construction techniques.
The shirts were usually made in unbleached or partially bleached linen. It is interesting to note that ‘Irish’ – a kind of flax linen is sometimes mentioned during this period for shirts. Although the shirts were usually plain – occasionally ‘checks’ such as blue-white and brown/white were used for work shirts. I have created this attractive shirt in fine linen fabric in an off-white shade. The fabric was washed in hand hot water twice prior to cutting as the material can shrink up to 10%.
While the choice of white material might seem go unnoticed today, in Beau Brummell’s time the wearing of white shirts, waistcoats and neck cloths was an indication of a man’s money. In order to maintain an immaculate appearance in a filthy city or the country, these easy to dirty clothes would have to be changed at lot which meant a lot of laundering charges affordable only by the well off.

The pattern of a man’s shirt was relatively simple. It was made from a series of squares and rectangles sewn together to form an unfitted and comfortable undergarment.
The neckline is formed on the body by folding a rectangle of fabric lengthwise – it is then cut into a ‘T’ shape to form the opening for the head. There are also triangular gussets sewn to the edges of the neckline at each side with shoulder straps stitched over the top. The neckline is then gathered and drawn up to the correct size to fit the collar. The collar cut twice the width required and then folded down in half and fastened by two buttons and tiny hand worked buttonholes.
The shirt sleeves are rectangles of fabric gathered into wristbands fastened by a single bone button and a hand sewn buttonhole. The cuff is decorated with top stitching – it was often made with replaceable cuffs (so the shirt would last longer).
The sleeves have a square of linen which is sewn to the top of each sleeve so when the shirt underarm seams are sewn together it creates a gusset to allow the arm full range of movement. The shirt sleeves are then gathered and sewn to fit the shoulder seam. After the side seam is stitched a rectangle of fabric called a sleeve binder is sewn to the shoulder seam inside to strengthen and finish the shirt. The shirt also has side slits which are hand hemmed. The sleeve seam is dropped – that is to say not placed at the top of the arm as are the seams in a modern dress shirt.

it is a very interesting fact that although the shirt frill at the front was very fashionable at one time it had fallen out of favour by this time as the cravat usually fully covered it Older gentlemen who were more conservative clung to the old insignia of rank with a ‘frilled shirt’. This however was usually worn only for the evening and by 1800 had usually completely disappeared.
Although it can’t be seen in the photographs the shirt is very voluminous – it reaches to the gentleman’s knees and is tucked into the trousers.
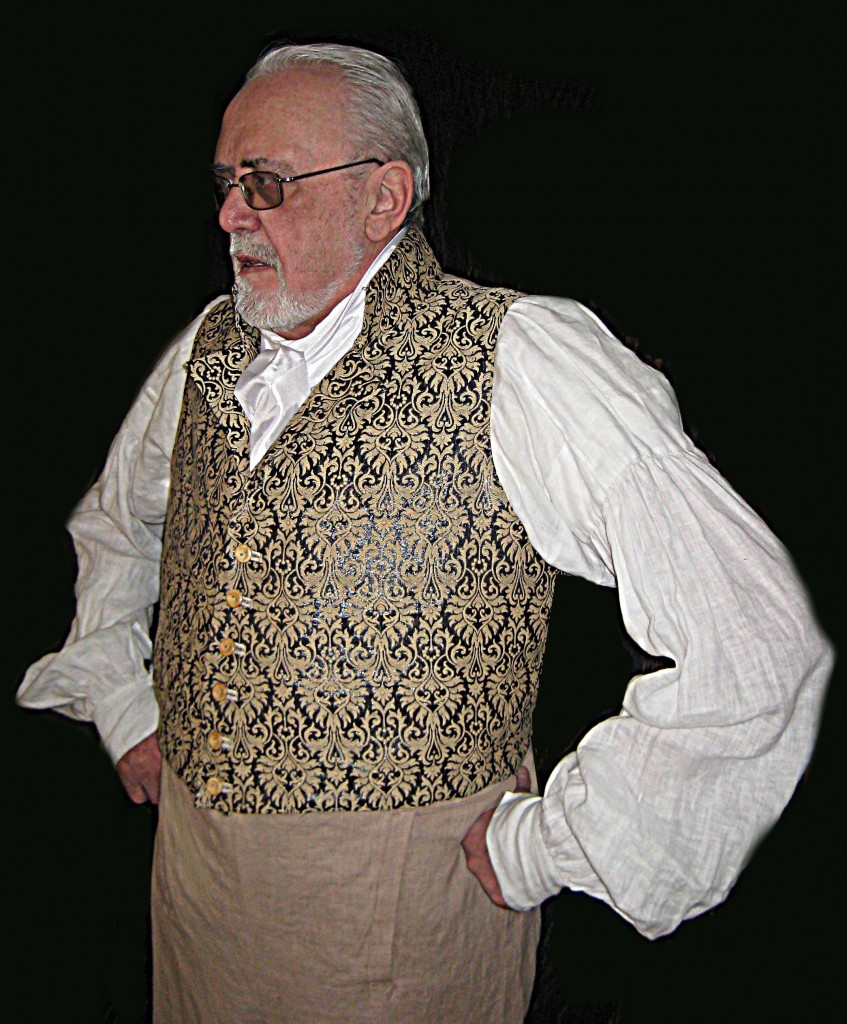
In the photographs the gathered cuff, shoulder straps and dropped shoulder can clearly be seen. It is certainly a very attractive garment!
Regency Gentleman’s Waistcoat
I have created a beautiful silk damask and linen waistcoat as part of my regency Gentleman’s outfit.
To make this garment I have based the design on a single- breasted gentleman’s waistcoat circa 1790 – 1815. It has a standing collar and six buttons. The pattern is inspired by features and construction details from numerous waistcoats and contemporary patterns and illustrations.
During this period only plain colours for a shirts, jackets and trousers were deemed fashionable so with his waistcoat the Regency man was allowed to choose a pattern. Any colour of fabric can be used as long as it is a colour that can be created from natural dyes. Fabrics used for waistcoats include cotton, silk, wool or linen. Sometimes they were embroidered, as they had been in the 18th Century, or else they could have patterns woven into the material. . I have used very high quality woven 100% silk damask in shades of black and fawn.
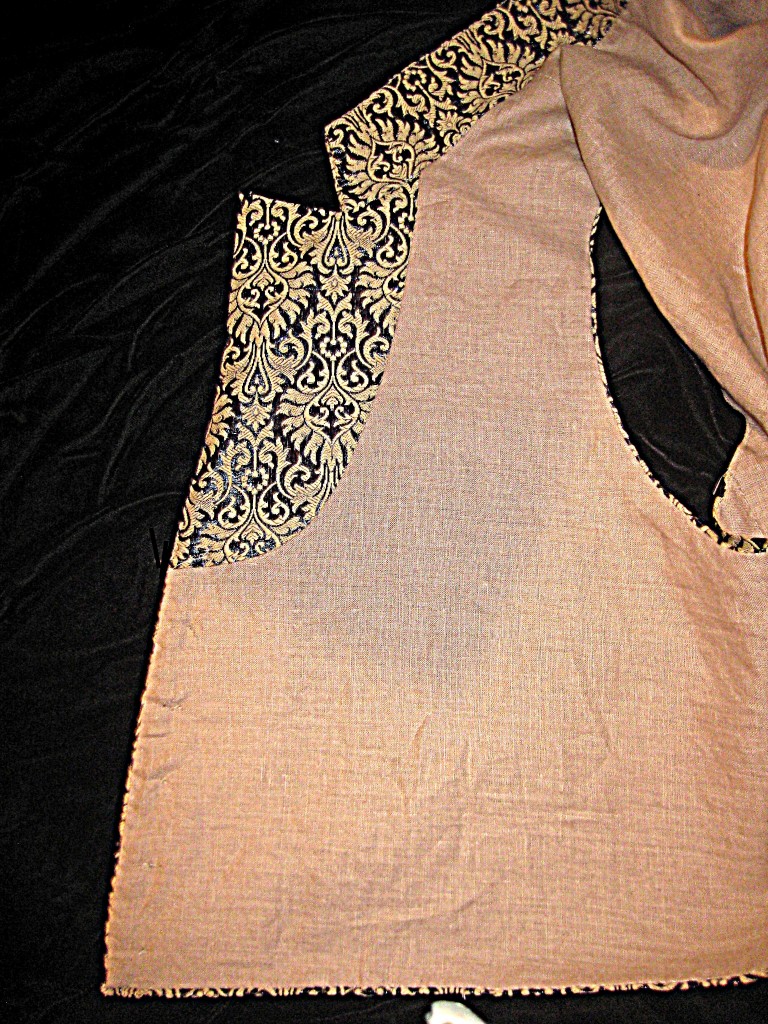
The lining for regency Waistcoats was usually a nice quality cotton or linen in a natural light tan or cream – I have used tan coloured light brown linen which was a remnant left over from making the Regency trousers.(see below).
Although most of the waistcoat was hidden beneath the frock coat, the fabric could be seen along the edges of the front lapel and collar and from beneath the bottom front panels of the frock coat. Regency period is all about elegant simplicity, no big floral type prints or anything too shiny. A regency waistcoat is also short, it reaches about an inch below the natural waist, it is not long like the 18th Century styles that hang to the hips. A regency waistcoat does not have have points – it is also a straight line across the front.
Please note during this period the waistcoat is intended to fit 1” below the natural waistline so the it will just cover the top of the trousers. There must be no gap between the waistcoat and trouser. It fits snugly and smoothly over the body so not creating bulk under the jacket. If required tapes can be attached to the back to tighten the fit across the chest and stomach.

It was usual to make the back of the silk waistcoat out of linen or a cheaper fabric as it would not be been seen – the regency waistcoat was never worn without a coat.
For the interfacing have used light canvas which is period correct. I
Before I started I made a toile (a mock up of the body of the waistcoat) in cheap calico. A toile [“twahl”] – or a muslin – is an initial mock up of a garment made in cheap fabric so you can check and alter how the pattern fits your body before cutting into your nice fabric.
The first job is was to attach light canvas interfacing to fronts and apply stay tape (1/4” wide) along the hem line of the front edge – this was to prevent stretching. I then hand stitched the lapel and front facings along the front and bottom edge. . The lapels are faced with silk only where the collar lapels turn back – the rest of the front lining is linen (see picture below).
Buttonholes are then worked down the front of the left front – I have sewed six neat buttonholes – not my favourite job I must admit!
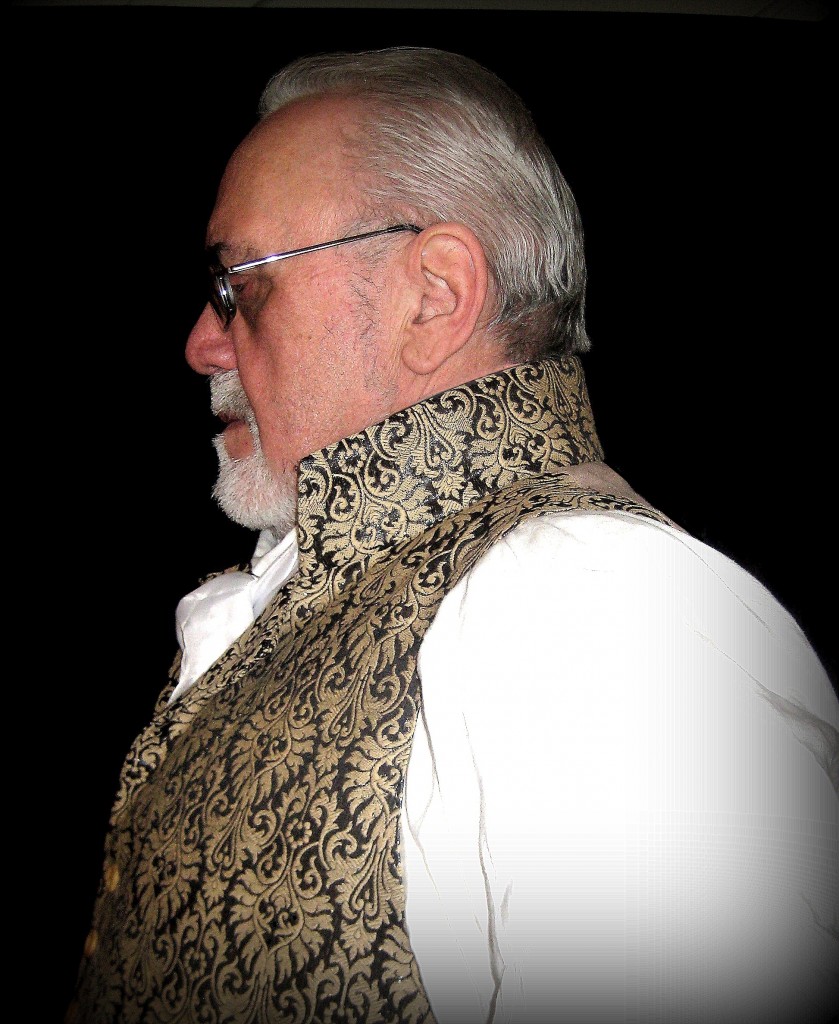
The back waistcoat edges are then pressed under and attached to the fronts at the shoulder seams. The collar is interfaced with canvas and sewn with small parallel stitches (pad stitches) to help the collar curve and keep it stiff. The collar is then stitched to the neckline.
The collar is constructed to look the same inside and out – with the inner and outer collar edges even and the edges sewn together with over-stitches. This creates a finished look from the front edges of a standing collar from any angle.
The lining was prick stitched to the outer front the full length of the arm scythe with lining and facing hemmed along the collar seam. The back lining edges are turned under and the back is attached to the front at the side seams.

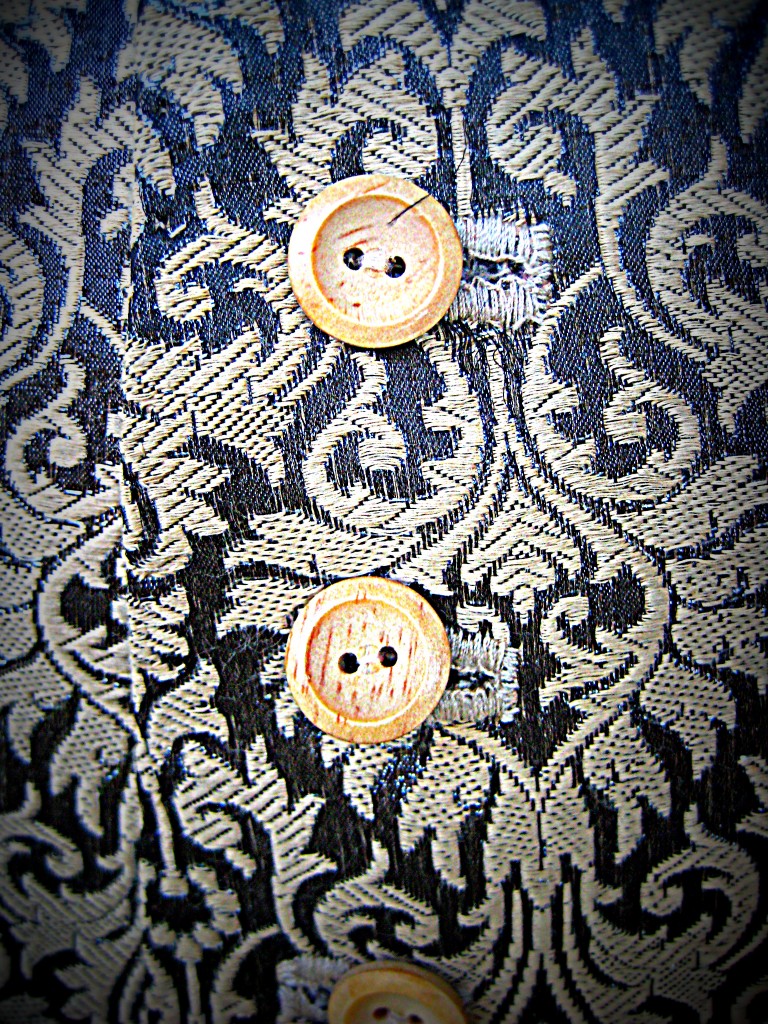
The back lining is neatly hand stitched along the side seams, arm scythes and lower hem edge and the buttons attached. Bone, metal or wood buttons can be used during this period. However metal buttons were usually used for coats only so I have used these pretty buttons in natural coloured wood for my waistcoat. I think they look very attractive and tone with the fawn tone of the fabric.
Waistcoats are usually worn with the collar standing at this period. Some had pockets and some did not – it is I suppose a personal preference. I prefer the style without pockets for a smoother line.
Voilà a beautiful Regency Waistcoat and believe it or not it fitted perfectly first time – it was well worth the time spent making a toile!
Regency Gentleman’s Trousers
I have created these Regency Gentlemen’s Trousers they have a high waist and were worn from 1790 to about 1810.
By the turn of the 19th Century, breeches, pantaloons and trousers worn by all men were sewn with a flap in front called a fall front. This flap was always held in place by two or three buttons at the top. No belts were worn instead breeches, pantaloons and trousers were held up by tight-fitting waists, which were adjusted by ties sewn in back of the waist.

As waists rose to the belly button after 1810, braces(also known as suspenders) were used to hold the garment up. They were designed for the waistband to be worn just under the natural waist.
The Trousers were slit up the seam for a few inches above the ankle as this allowed the foot to get through the leg of the pants. Trousers were made of wool, linen or cotton. Though they were at first only appropriate for day-wear they eventually gained acceptance for wearing in the evening as well.
The back had rather full fabric which I have pleated into the waistband at the back – seats were baggy to allow a man to rise easily from a sitting position. They also could have a drawstring tightening at the back (the behind should never be seen since it’s always covered by tails). My trousers were inspired by the style of several pairs of trousers from late 1700’s and early 1800’s. To be honest they do look strange and full at the back – when compared to modern trousers but nevertheless are correct for the regency period.
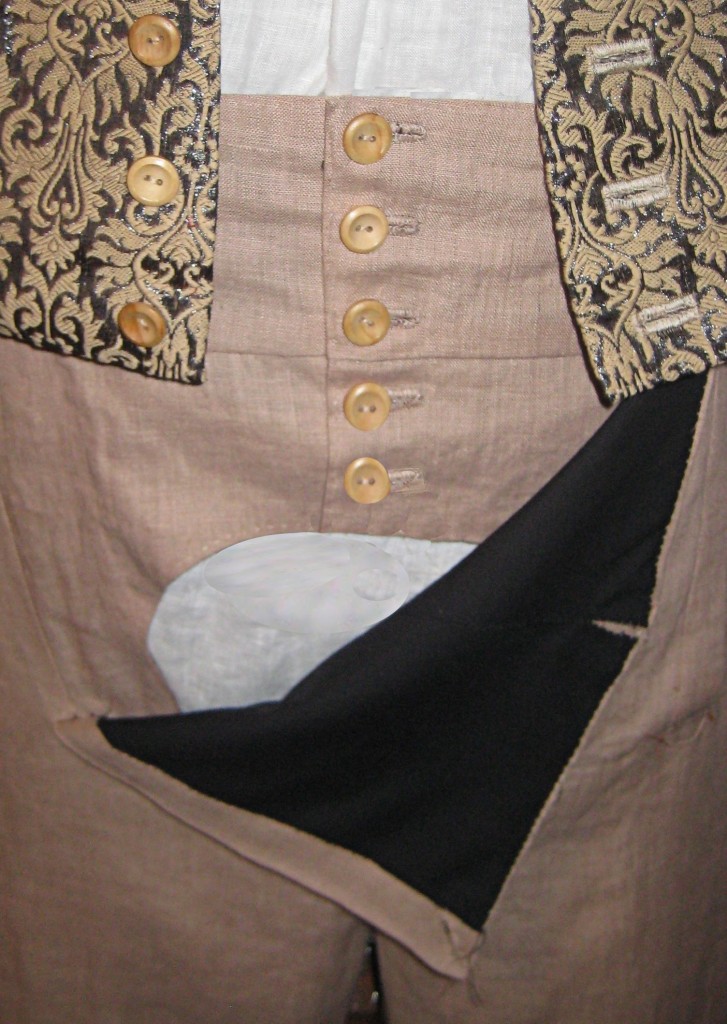
These trousers have the waistband in two sections, left and right with a lace tie at the back and buttons in front. There is fall closing (which unbuttons to let the flap down) and below fall flaps called bearers. There are also rectangles of fabric called binders which finish the edges of the the fabric cut to create the flap. A pocket is placed on each side which has button closures. There are also short opening at the ankle seams called vents and linings in the fall and waistband. Legs are cut on the straight grain with no pressed creases!
The bottom edge of the waistband sits at the natural waist and the ankles are loose and finish at the ankle bone not the shoe as in modern trousers. Suspenders or braces must be used to hold them up.
Fabrics used during the regency period included cotton, flax, hemp, linen, wool and cotton/linen mix. Colours included yellow-tan, blue various browns, white and pale colours for fine dress or a variety of other deep tones worn with a dark blue, green, or brown coat. I have used a fawn shade of medium weight linen with black cotton for the lining.
The trousers were assembled as a left and right half and then joined at the crotch seam.
I lined the bearers (also known as under-fall) and stitched two buttonholes on the left side of the bearer only.
I attached the fall binders and bearers to the trouser fronts. I then attached the fall linings.
I made the pockets in black cotton fabric and attached them to the trouser front. I then worked buttonholes in the pocket flaps and fall binders and stitched the bottom edges of the pocket together on the inside.
I then stitched the side seams of the trousers and hemmed the ankle vents. The waistband was lined and attached – I pleated the fabric to fit at the back – about eight pleats each side.I left the back open (for the lacing).
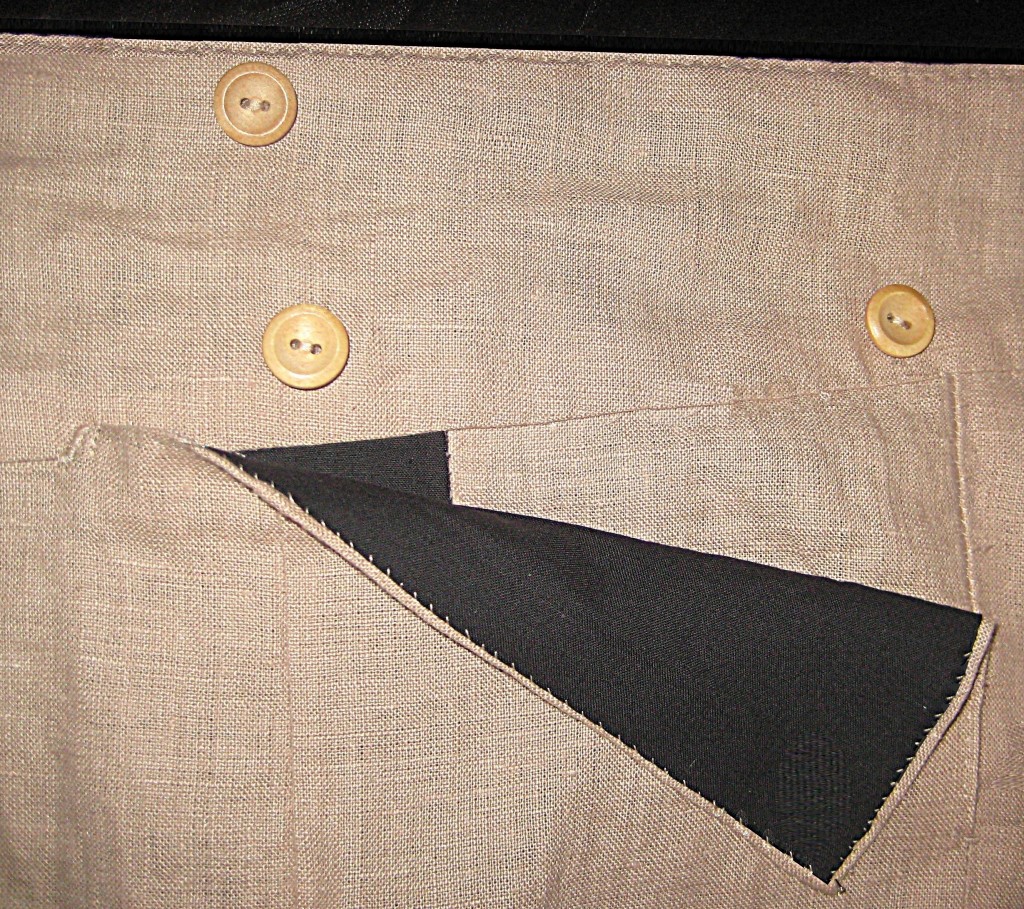
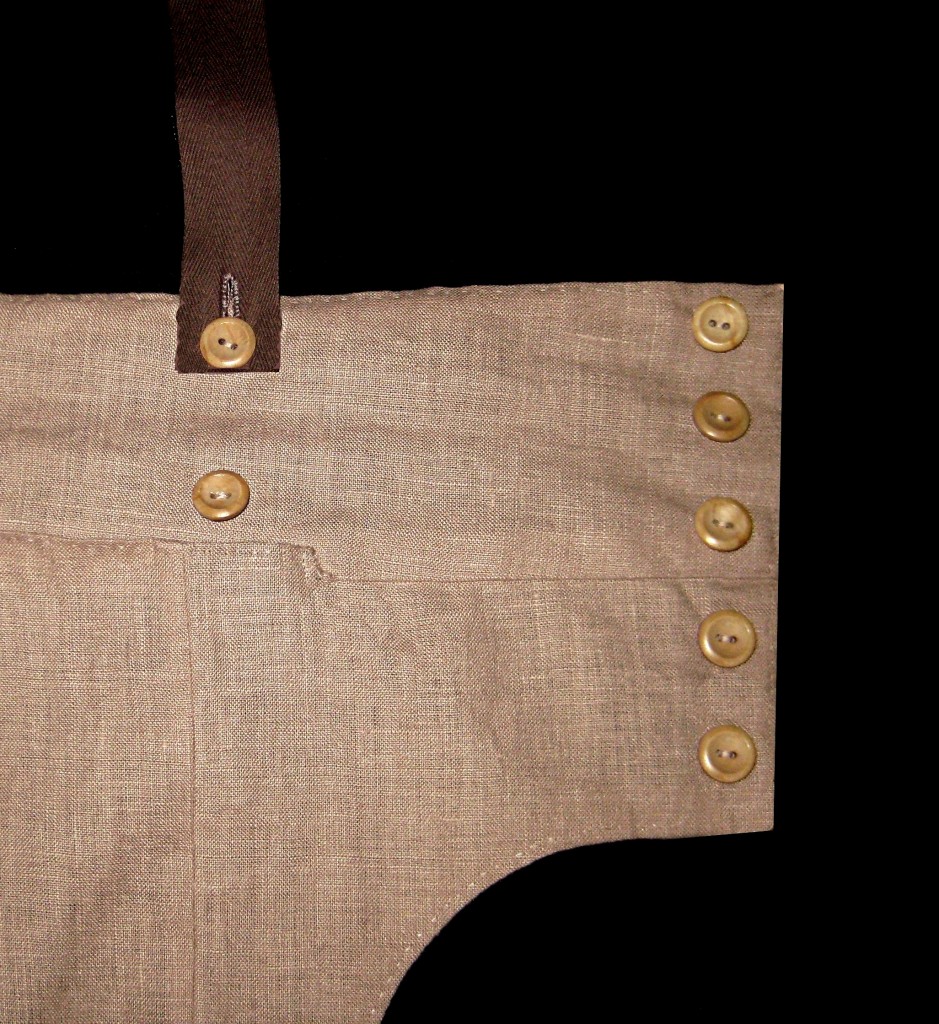
I sewed buttonholes in the left waistband and stitched the inseams and crotch seam. Finally I worked two eyelet holes into both sides of the back waistband and. threaded through a tie for fastening. I then attached 9 buttons!
I also made a pair of simple braces of brown coloured woven strapping attached to the trousers by four wooden buttons – two at the front and two at the back. The cross at the back is back stitched in a diamond shape to prevent the braces from slipping off the shoulders.
The trousers fit very well and certainly look the part with the waistcoat and shirt.

I have included only basic construction notes in this post however If you would like to recreate these garments yourself I would certainly recommend Kannik’s Korner patterns which include full and comprehensive instructions. For more information I would be happy for you to contact me.
By the way just a note – I am currently searching for some period glasses as Specsavers aren’t quite the part -if anyone can help please contact me!
My next project is to design and make a regency Gentleman’s coat and cravat to complete this costume – I will be posting pictures when finished so please watch this space!
